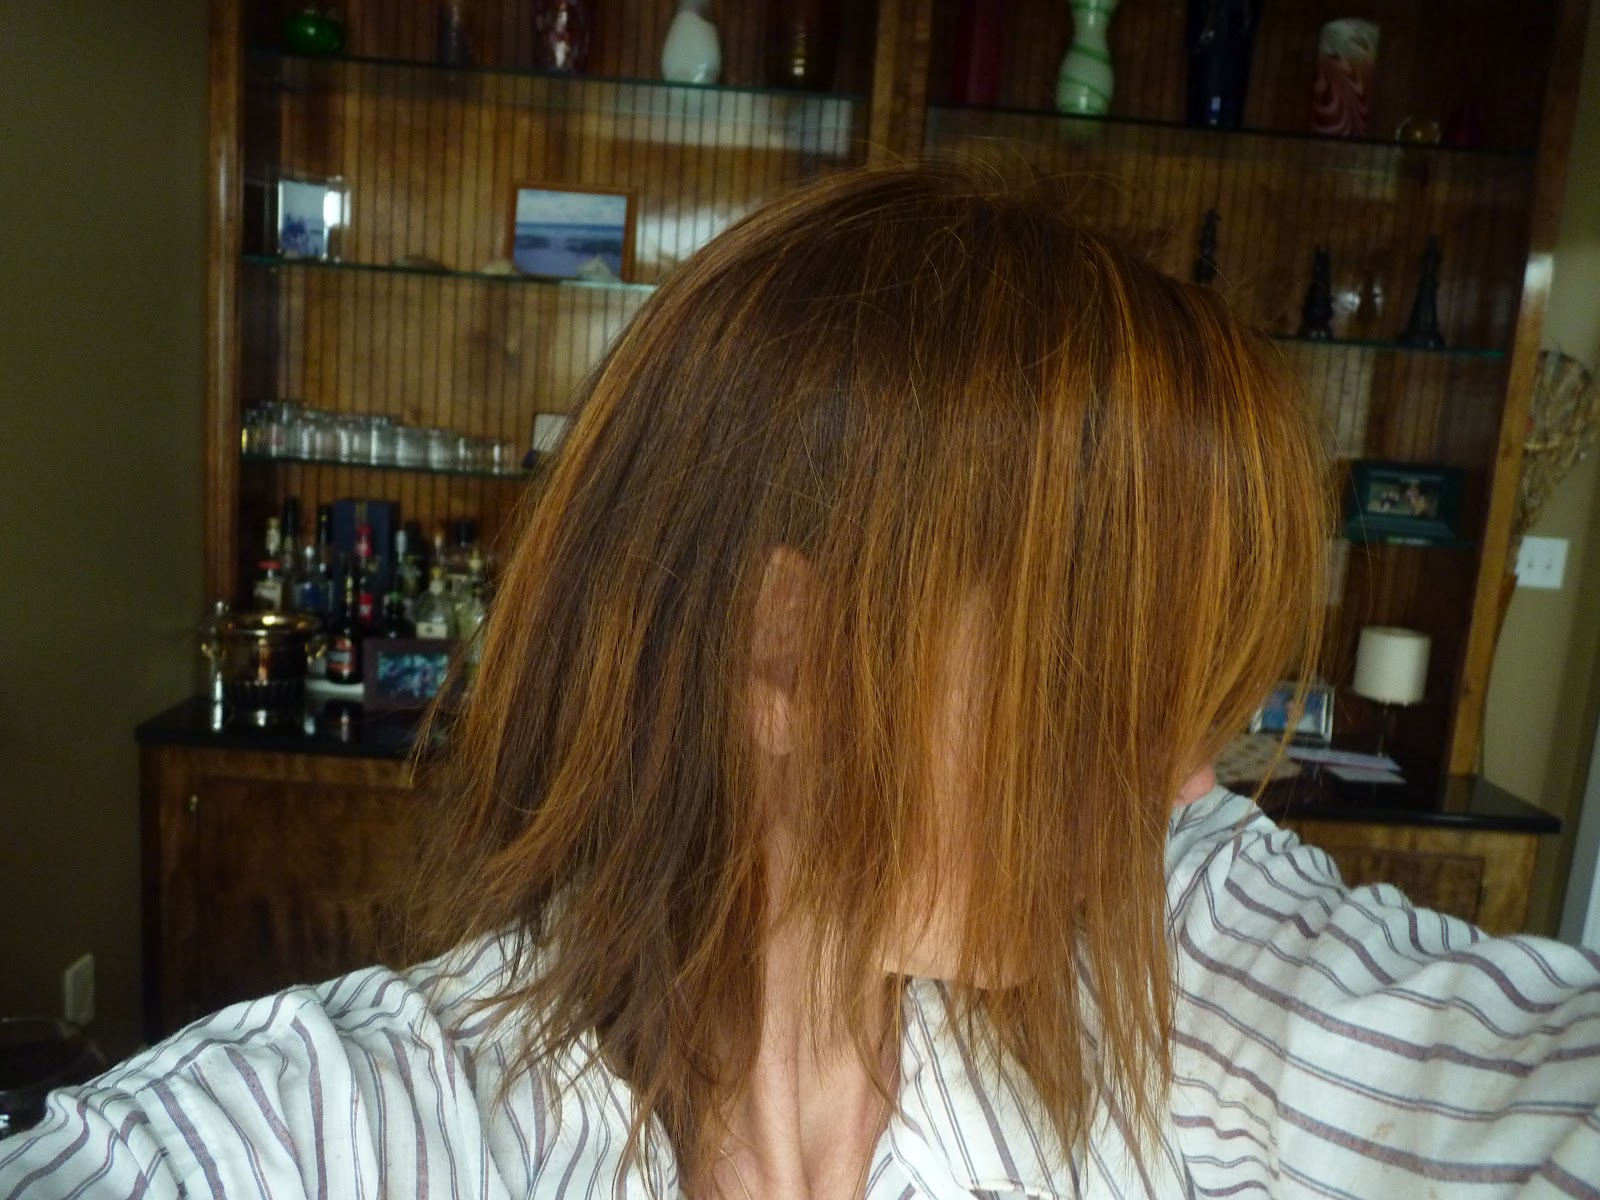
Henna again & still loving it


So after about 3 weeks of enjoying my hennaed hair I was starting to notice grays showing up in my roots. So one morning last week I thawed out the leftover henna past while I mixed approximately 1 Tablespoon of indigo powder with warm water to make a yogurt consistency. I allowed the indigo to get dye release for about 15 minutes while the henna thawed in warm water. 
I then mixed about 3 tablespoons of henna paste with the indigo paste and then added approximately an equal amount of conditioner to this paste. I smooshed the hendigo paste into my roots and then covered the lengths with this mixture. Once I had covered my hair with the mixture I wrapped it all up with some plastic wrap and popped a cheap plastic shower cap on top. 
I then spent about 1/2 hour checking Facebook and such. Then I rinsed my hair with the help of cheap conditioner to help get the henna bits out of my hair. 


Once again I was impressed at the difference in my hair compared to chemical dyes. Instead of feeling spongy and fragile after coloring, my hair felt sleek and soft after henna/indigo glaze. 


 As you can see in the photos after the glaze- you can see a difference in my virgin hair (non-chemically colored hair) and the henna/indigo roots. Unlike chemical dyes, the process does not lighten the hair first- so the henna/indigo mixture adds depth to my hair, makes grays coppery but can't give the color to the already lightened hair that was chemically processed. I am actually looking forward to when my hair is longer because I actually prefer the virgin hair coloration than the stuff that was chemically processed. I like the darker richer color of my natural hair with henna. I am planning to add additional indigo to my next glazing session to maybe match my roots better. I don't mind the red tone of the chemically processed then hennaed hair but prefer the richer brown of my roots with the lovely coppery highlights rather than grays.
That's the really nice part about henna- it gives so many variations in color in your hair unlike any chemical dye can- because it adds color to what's already there rather than strip and then "recolor" like chemicals do.
See coppery color variations for grays/old highlights - that's the beauty of henna vs. chemical dyes- it lays color into the hair already there so you get much more natural results. Mono-chromatic hair is a sure sign of dying it. LOL

Instead of grays0 they are strawberry blond to copper strands- that's much better than grays.

The color looks very different depending on the light. Sometimes my hair looks redder. Sometimes it looks browner like in these pictures. But I think the color variations make it look very natural in all of them- whereas I would feel self-conscious of my just dyed- monochromatic hair with chemical dyes.  The shine and softness is impressive. I'm a henna head-- can't go back to chemical dyes. It's nice that I'm doing something good for my hair, making it thicker and stronger rather than damaging it every time I need to hide my grays. 


LOOK AT THE SHINE!!!

Loving my hennaed hair

Biggest response I got from comments after my post about my first try at hennaing my hair was "sounds complicated" or "too much work." As my daughter said, "It's more like baking fresh bread- takes a long time between start and finish but not all that much actual work involved." And like homemade bread- results are worth the wait time and little work that it actually takes. 


While working on yesterday's post I did a henna gloss to oomph up the red tone in my hair after old highlights/grays were slightly green cast after henna & indigo. This was super easy- I had mixed the henna (more lawsone content) the night before and let rest overnight for dye release. I grab the baggy of henna paste and added about 3/4 cup of (cheap- Suave) conditioner and about the same amount of henna paste. Slathered this on my hair with gloved hands, popped a cheap disposable shower cap on top with a bit of paper towel under the elastic to prevent drips, and wrote my blog while waiting a bit. A half hour later I rinsed well (easier to rinse gloss out than henna/indigo pastes) and eagerly looked to the mirror for the results-- PERFECTION!! The perfect brown with auburn slant that I was looking for but with bonus of thicker, silkier, stronger, shinier hair. My hair was really thin- more like invisible thread whereas I'd say now they are nearly double the size. 


Henna doesn't have to be as "complicated" as my first time. My problem was my starting color was complicated- my typical color routine was to dye my hair some sort of ash brown and then do highlights to blend grays and I always hated the way boxed dyes made my hair way too mono-chromatic... no matter how much they said "dimensional" they left it pretty much the same color all over which in my opinion is NOT natural on medium brown hair. The other reason my henna session was complicated is that with my skin tone, I had to be very picky about balancing the color- it could be auburn but not copper/orange with my olive tan skin color. 


So if your hair color is close to normal- the recipe for success doesn't take 3 attempts like it did me. If you can take more red toned hair- then just the henna session would have worked on you. If you had darker hair (no highlights) the henna session would have just provided you with lovely red highlights in the sun. If you had black hair to start with, you could have achieved lovely black hair by following freshly hennaed hair with indigo only- indigo doesn't take well to hair without a henna session first. Most of the video tutorials I found on henna/indigo were on African American hair- so that tells you something about the beneficial effects of using henna & indigo. For those wanting just to oomph color- a gloss like my 3rd session would have been perfect. Really not much more time than a box hair color other than the preparing the henna the night before. Plus the next time you want to gloss your hair all you have to do is thaw out the leftover paste. 


I will never go back to commercial dyes- my hair feels way too amazing and the color is totally me. Plus I know I can hide the grays easily with a glaze whenever I need to- no more need to wait to give my hair a rest between dying (drying) like before. After this first venture I have learned so much already- I only need a little indigo to tone down the red. I've even learned that the higher lawsone content in my henna is actually better than the weaker ones. My hair can take the red but the weaker ones tend to take it to orange which doesn't look right on me. I think from here on out, it's more maintenance glosses (30 minute sessions) rather than full on henna day- the total time I had henna/indigo/henna gloss on my hair was 2 hours/1 hour/30 minutes. Less than a typical henna session due to my hair being thin and taking up color easily. I can't stop stroking my hair since my henna sessions-- it's really that silky soft. I also notice another big change after henna- I used to shed like mad-- enough so that it kind of grossed out MIL when I would visit because my dark hair would show up on the pillows/bedding. I haven't found a stray hair since. I find this amazing because can't tell you how many times I'd be searching my shirt for a hair that was tickling my arm- I see this interpretive dance becoming less daily-- my brush (which was cleaned out to do strand test) had about 5 hairs in it since hennaing. That's a major deal to me. Plus you can henna your brows to make match your hair-- anyone that's ever gone red knows how wrong brown brows look with red hair-- but if you do with commercial dyes you could lose your eyesight. 


I leave you with these shots taken yesterday after doing the 3rd henna only gloss of 30 minutes. 
3rd time's the charm- after 30 minute henna gloss

Not too orange, not too green- brown with red flare and look at the shine- never got that with box dyes

Love the dimension the henna process has given my hair. This is what I've always been trying to achieve with traditional dyes. 


Henna Happenings with Hoozey.

Howdy all. Long time, no blog. Sorry about that but "RL" got in the way- as in real life. I have been super busy which I will fill you in on in another blog but today's venture into henna hair color demanded a blog.

Silly me did not take a before photo. I meant to but in eagerness to try henna for the first time I forgot until it was too late. So I'll try to describe my before hair color- the bottom and back of my hair were intentionally darker- like a medium slightly ashy brown. The front and top were highlighted to make the gray blend in better as they grew in.

What drew me to henna was my daughter reading up on it because she has always craved auburn hair. She's been dying her hair with the demi-permanent hair colors for about 2 years and considers herself a redhead- that's what she feels is her true color- rather than the mousy brown she naturally has. She worried about the damage she may be doing to her hair by dying it and the roots always show up extremely green looking against the auburn so it only looked good at the very beginning. Plus everyone knows that red is the hardest color to keep from fading. She said that it actually makes your hair healthier. I worried about doing henna and it not working out right and never being able to go back to commercial dyes- you know how many say not to use on henna hair. That is actually a misconception on henna. You can go back IF you get 100% pure body art grade henna- it's those "hennas" that have metallic salts in them that are the bad ones.

So I started researching henna myself. First thing I learned henna is only red toned. All the henna kits that say brown or black colors are not just henna. That's not to say that you can't get brown or black hair using henna and other natural herbal hair dyes. Second I learned that henna will not lighten your hair- it will coat it with red pigment- so the color you end up with depends on the color of your hair to begin with. White hair dyed with henna will be vibrant red but dark hair will only have some red highlights in the sunshine.

Henna can strengthen, condition and thicken hair. It is also known to loosen curl pattern so frizzy hair can be tamed a bit by henna. It gives lots of shine since it only adds color without stripping hair like commercial dyes do.

Other herbs like Cassia Obovata (neutral henna) will add golden tones and shine. Indigo can be added to your henna regime to get brown and black results. There is also a long list of herbs for hair but I will focus on those for coloring hair naturally in this post.

I ordered body quality henna from Henna Sooq per Michelle's recommendation. I ordered almost every "color" of henna since daughter wanted red and I wanted browner results. The difference in these hennas is only in the amount of lawsone (dye henna contains) in the plant. The more lawsone in the henna the more intense red the results will be. I also ordered amla, indigo, bhringraj, bhrami and shikakai--some to make henna more brown, others just for their herbal haircare benefits. I'll blog about these as I use them but I was definitely interested since my hair has been described as "a forest of skinny trees" meaning I have a lot of hairs but they are baby fine- so my hair can use some fattening up.

The downside of henna is the time commitment- unlike commercial dyes- henna needs to be mixed in advance for dye release (about 12 hours) and then needs to be on one's hair for much longer than the typical 30 minutes (now some even only 10 minutes) of box dyes. It is also a learning curve to achieve the color you want and henna is permanent. The upside is that one is left with healthier hair and you don't have to wait for your hair to recover from coloring.

So I mixed 100g of the henna with the least amount of lawsone with ACV and strong coffee to make it the consistency of pudding the night before doing strand test- hair from my brush. I let this sit overnight for dye release. I also mixed 2 different 100g packages of henna with higher lawsone content for DD's use- she has thick, slightly longer hair so I knew she'd need more than one package since she needs 2 packages of traditional dye to get all her hair. I mixed these with lemon juice (bottled kind) and water until I got the pudding consistency and let it sit overnight. The next day I added a tiny bit of amla to my mix for one trial and just the henna mix on the other for my strand tests. I added a little paprika (for redder results) to one of DD's strand tests. Left these mixtures on the strands for about 4 hours (wrapped in plastic wrap.) Upon rinsing all the strand tests were definitely red-toned and no noticeable difference between the amla/paprika additions. I wore gloves for this- henna stains hands easily-- drier areas take the dye better than moisturized areas so I did apply moisturizer to my hairline to help prevent staining.


I placed the henna mixtures in the freezer for storage. Monday morning I got the mixtures out and placed in hot water to thaw while I mixed up about 3 tablespoons of amla with strong tea and instant coffee. I also mixed a whole jar of inexpensive paprika with hot water for DD's henna. I mixed the amla and henna together and placed in a carrot bag-- cake decorating plastic bag. I woke DD to help pipe the mixture onto my head. As predicted my hair was coated with less than the full mixture- I had about 1/3 left after application. We wrapped my head in plastic wrap then I topped with a cheap plastic shower cap and wrapped with a pre made wrap I found in the ethnic hair area of Walmart. Then I mixed paprika in DD's mix and applied to her head-- took the whole amount. We placed a little of the henna mixture on her eyebrows- one of the perks about henna is that it's safe to dye brows the same color. We wrapped her head in the same manner and put two small pieces of plastic wrap over her brows to keep the mixture wet. She then proceeded to go back to bed (she had worked at Steak N Shake the night before.) After 2 hours I checked a small piece of my hair and found that the henna definitely took. So I started rinsing it out of my hair. Most of the places recommended using an inexpensive conditioner to help rinse the muddy paste out so I did that. I rinsed many times this way- using about 1/3 of a big bottle of conditioner. After I felt like my hair was pretty clean, I packed on some heavy duty conditioner and placed a cheap shower cap over it to deep condition about 1/2 hour. Eventually DD woke and we rinsed her hair out after about 4 hours with the henna on it. During this time, my hair had dried naturally and I found it too red/orange for my liking so I thawed the leftover henna and mixed about 35g of indigo with hot water and let it rest for about 20 minutes for dye release. I then mixed the two together and applied to my hair, wrapped in plastic wrap & shower cap and waited about an hour. I repeated the rinsing process this time with another Suave conditioner (Coconut) which I found was actually a little better for getting the henna mixture out quicker. The results were much closer to my natural hair color although the highlights were ever so slightly green tinged from the indigo. Indigo is a can't go back choice because lightening it will produce frog butt green. Henna can be lightened. I was OK with the results with this second hendigo application-- I may do a henna gloss (henna mixture mixed with conditioner) to redden it up slightly. In the future I will probably opt for redder henna mixed with less indigo-- I'm OK with red tones to my hair but not ORANGE. I don't blame henna but more about all the stuff done to my hair before that made getting things right a little more challenging. I needed to get my hair darker all over with indigo addition but think in future doing just henna could look fine the next time around.
Henna only application-- too orange 
Highlights too orange with henna only.
After application of henna & indigo. Took down the orange
After Henna & Indigo- Indigo made it ashy/greenish but more natural than the orange

Henna Only- too orange in the previous highlights/grays


Big day

Today my beautiful daughter starts college. I couldn't be more proud of her- from the start she was perfect, I went into labor at about midnight of her due date & she was born that afternoon. She did everything right about the time she was supposed to or earlier-- like she was walking at 9 months but still didn't have a single tooth. When she tested for kindergarten, the tester accompanying her back to the cafeteria to return her to me was shaking her head... I was thinking "uh oh, she's not ready" but then I got the results and the head shake was due to Paige's extraordinary readiness emotionally to attend school- she wanted to stay LONGER at testing. The only "ding" she had was that her birthday is in Aug. making her younger than most of her classmates. Before she could attend her first day of school, we moved from the Cincinnati area to South Central Kentucky which had started school before we had even moved. Paige had missed about a month of school but quickly became one of the top students.

My kids never attended pre-school-- they did not know how to read when they entered school. I taught them the alphabet & how to write their names but I felt my main duty was to prepare my kids to be able to sit still, listen and be ready to learn-- in other words, I taught my kids self-control & how to behave. This seemed to have served them well because all of my kids are top students and other adults & teachers rave about my kids' behavior.

So last Thursday I drove Paige & her stuff about 15 minutes away to the local university where she will be part of the honors college-- all paid for by scholarship. Yep, her nickname (from another parent) of Perfect Paige seemed to run true again. When she was considering colleges, she was guaranteed full tuition at most in-state universities due to her participation the previous summer in the Governor's Scholar Program. Paul (hubby) told Paige that we would pay for the rest wherever she went because she had done such a wonderful job working in HS to get the grades & scholarships. Even with this offer, she chose to attend local university because her first choice would cost (us) about $10k for room & meals whereas she was automatically eligible for free room & book allowance by attending local university. Her state money for getting good grades in HS would cover her meal plan. She checked into comparison of education because ultimately she plans to go into pharmacy school- the local school would provide her with the education without costing us anything. An incredibly mature decision made almost a year ago-- ironically latest Readers Digest has an article on "10 things every parent should know about college" "1. Beginning adulthood without debt is worth far more than a designer diploma" & "10- Honors colleges at public universities can offer as fine an education as the Ivy League." So she will get her undergraduate degree (Chemistry) for free as long as she keeps her grades up.

During HS she took 3 Advanced Placement classes- Psychology & Biology as a Junior, Chemistry as a Senior. She got 5 on all three year end tests- top score- meaning those HS classes would count as college credit. So for $90 test, she gets college credits-- well-worth it. As an incoming freshman, she is taking organic chemistry this semester!!!

On top of this, she has decided to keep working weekends at her newly acquired job at the Kroger close to home. She feels a certain amount of responsibility to stay on since her best bud vouched for her- Paige had no paid real work experience- although anyone that knows her would hire her in a minute-- she was Valedictorian and was a (paid) tutor since she was a sophomore. Her athletic career (3 years participant at state track meet- took 3rd place this year in triple jump) is a testament to her work ethic... though not exactly gifted physically, she worked her butt off so she attained these successes. It's funny because her supervisor gave her some grief over not having work experience- he obviously doesn't know how lucky he is to have Paige. He also was rather snotty when he asked about # of hours she wanted to work... she only wants weekends due to college starting. He asks "Are your parents rich?" to which she replied "I just need some extra spending money because I got full scholarship." Anyway, I am glad she will be working because it rather forces her to come home on weekends- she doesn't have a car so will need to rely on us to get to work. This may change if she learns how to drive stick- Paul's truck is a stick shift & rarely used because he has co. car for work travel but it only seats 2-- she can't take family (automatic) car to college since I need it to transport boys anywhere.

Saturday morning Paul & I picked her up after our workout at the track (we've been using the college track for years since it's rubberized.) She spent a few hours at home before heading off to Kroger to work her shift. Last night I drove her back after her Sunday shift so she could attend her first class at 8 am this morning. I didn't think I would miss her but it did feel weird-- maybe it was because Paul left for biz trip last night so it was first night without Paige & Paul being home in a very long time. I am sure I will adjust to the new normal-- Paige being on campus vs. up in her room. My little girl is growing up. As I type this my I-tunes is playing "Zoe Jane" by Staind-- this is a song that so reminds me of Paige. I once mentioned that if she has a wedding, she needs to have that song playing to dance with Paul- there won't be a dry eye in the place if that happens.


Last week's work.


Last week I had a break from window treatment jobs so I finally got around to some projects I'd been planning to do all summer.  One much needed project was staining the deck. The dogs mess up the deck itself while the squirrels scratch up the railings. So all the horizontal surfaces really needed new stain. First I scrubbed the deck with bleach & then applied a coat of stain. Of course I happen to pick one of the hottest days of the summer to do this project-- so one morning I started staining at 7 am.  Here's a few shots (for LT)
Deck after scrubbing but before all of it stained. 

I was waiting for the stain to dry a bit so I could move the grill onto stained part & finish the rest. Thought it was a good time to do before/after shot. See the neighbor's pool being so damn tempting in the background... no one uses the darn thing!!
Deck steps torn up by the dogs- deck table is in rock area waiting for this job to be done- you may notice Jack on the stepping stones- the dogs hate the river rock & actually use the stepping stones. 
Fortunately I didn't have to do the vertical surfaces- except a few uprights hubby added underneath the steps to support them more. You may notice the two chin-up bars on the supports behind the ladder-- hubby uses the tall one for chin ups  & "Bubka's" (exercise where he pulls himself up & inverted- so his feet end up next to the railing above his bar.) The shorter one is for me & kids. 
Aluminum framed chairs with plastic
"wicker" is easily updated with "Fusion" spray
paint.
I also spray painted the bejezus the weekend before staining the deck- enough so my poor little fingers hurt from holding down that little sprayer top. I used "Fusion" spray paint in True Blue on these very old (purchased about 10 years ago) chairs that have plastic "wicker" seats. Originally they were silver frames & tan wicker. Years ago I painted the frames hunter green to match the (then) deck table. Then the wicker that was wrapped around the arms started shredding off so then they were hunter green with silver "armrests" & tan wicker. Thought I'd try out the Fusion paint that adheres to plastic & I definitely like. I like the bright pop of color. These chairs are no longer used with the metal deck table because I found some metal chairs at Sam's club that matched  it for like $20 each last year. Instead these blue ones are used down at ground level for pole vault days. Hubby typically uses one along the runway to rest his poles on. Boys & I typically use the others down on the mat end  to catch steps (take off) & video.  Along with the blue chairs I sprayed the metal table (now black instead of hunter green) to match the chairs. Also touched up the chairs since there were a few little spots of rust-- this way they should last forever if I keep them up in this manner. I really love both the table (over a dozen years old) & chairs because they are such easy care if I just spray paint them every so often to keep the rust at bay.

I had to take this one to show you part of hubby's workout- see the white spots on the black runway mat? Those are chalk HANDprints from hubby walking on hands to increase balance & upper body strength. Things are a little different at this house. LOL The tally marks on the bricks is actually his work- not kids... he uses chalk to mark runway & to keep track of how many vaults or sets of workouts he's done. The kookiest part- in our basement shower is a 50 gal. trash can filled with cold water- hubby dumps ice into it & stand in there for about 15 minutes after workouts. I know, we are a strange household. 
Jack usually gets to eating right away- so he gets the pouch food with gravy & leaves Sully just the kibble-- yet Sully is the overweight one. You can see my tomato plants, dill (got ravaged by caterpillars) hot peppers and herbs (above retaining wall) along with one of the blue chairs and corner of table that goes back up on deck. 
Sully is more interested in keeping food away from Jack than eating... it was already pretty hot that day- Sully doesn't like the heat. 
Sully being hot. 
Thought I'd throw in a couple of photos of the pooches for your viewing pleasure since Jack was in other shots anyway. =)

PAN--- No-No!-- Blows-Blows!!!!!

So last time I blogged I was raving about Ready To Wear's mascara or rather Lash Extension product with mascara. Still LOVE, LOVE, LOVE that! Let DD try it out (just Lash Extension w/ her other mascara) and got "can you get me some for my birthday?" I will be watching Ready To Wear on HSN for any bargains with this product!!

When I ordered the Ready To Wear kit, I also ordered the special value of the day from HSN... No-No! Hair remover. 60 days to try it out, free shipping and flex pay for long term hair removal- sounds awesome right?? The demonstrators were running this puppy all over with big smiles and words like "grows back finer and finer" coming out of their mouths.

About a week after my order it arrived. Whoo-hoo-- Hoozey is on her way to be this hair free goddess right? I read the directions and seems easy enough but starting to think "hmm?" because they recommend burning scented candles to mask the smell of burnt hair. NICE!! "Honey, what's that awful smell?" "Oh, just me & my No-No!"

So first I try it out on my arms with the smaller tip because in all honesty the stache & goatee are my least favorite "hair issues." At first the head kept popping up & down but I learned the correct way to "glide" it along my arm. On to the face! "OUCH!!!! WTF was that??? Is that little "slash" a burn??" Pull skin tighter-- "OK, maybe I'm getting the hang of this" as I roll No-No! along cheeks-- ah, the smell of burnt hair.  Back to trying on chin & stache -- "OUCH!!!" OK that's probably enough for today... time to buff and work on legs.

30 minutes later about a 3 inch by 12 inch swatch on right leg has been No-No!-ed-- I'll be hair free in no time......NOT!!! Buff, buff, buff... hmmm, seems like it missed some. Not even that area is "hair free." This may take some time to reach "hair free" status.

A few days later, I try again-- same results only now when trying to do my legs, the No-No! indicator keeps saying that the head is no working properly. Turn off, turn back on, & work on leg-- damn AGAIN??? As if when it is working properly isn't time consuming enough??? Face trial again-- OUCH!!! OUCH!!! OUCH!!!! Not even going to TRY this on my bikini area or armpits. WTF were these people thinking??? WTF was I thinking when I order this???

No-No! went back in the box and I gladly paid the $5.50 to ship that piece of $h*t back to HSN. Lesson learned-- facial hair removal will have to be the old plucking, waxing, whatever. And I would much rather spend the 5 minutes with my Venus razor to actually have smooth legs and pits!!!!

Here's a lovely photo of my face with all my No-No! burns...  & all the hair left behind too!

NICE Huh?? Isn't this a lovely look??

The kicker is that with all this pain & suffering (and time) No-No! does a horrible job actually removing hair- just doesn't seem to get all the hairs in it's path burnt so you are still left with stubble after it's use. And you are left with such a pleasant smell in the air/on your skin. Like I am just going to sit around my living room, watching TV & using my No-No! Only thing that would be nicer is eating bon-bons along with???

So after I made decision that No-No! Blows-Blows!! I am watching "Good Morning America" one morning and the woman is reviewing "as seen on TV" products. Low & behold she is doing No-No!-- after the review, I just count myself lucky that my burns were  as few-- her chin looked like crosshatching of little No-No! burns!! She ended her No-No! segment with "No-No! NO NO!!"

FAN & PAN-- Latest beauty trials

Been a LONG time since I blogged. Suffice it to say that I was very busy with end of school year, track season, & DD's graduation along with a large interior decor job and beach vacation. I finally finished up the sewing projects for customer the other day and wanted to take a bit of time to review two recent purchases. 
READY TO WEAR- L-R- Power Lash Mascara,
Lash Extension & Volume Lash Mascara. 
BIG FAN of READY TO WEAR Designer Volume Lash & Designer Power Lash Mascaras along with LASH EXTENSION. I recently purchased these off of HSN- these three products along with a eye shadow collection in a single case for $35. After seeing the performance of the mascaras/lash extension demonstrated on air at HSN I thought I'd give it a go. You may know what a mascara fiend I am so this may not surprise you. Plus they had the set on flex pay and free shipping. Even drug store bands of mascaras can be pricy so the price tag was reasonable in my opinion. The trio of eye shadow colors were almost identical to DD's favorites from Dayna's Minerals eye shadows- Rustic, Summer Highlight & Mahogany- in one little pan so I thought it may be a nice little gift for her to have in one handy container at college. I did try the eye shadows- the colors are nice but they do not apply as effortlessly as my own loose mineral eye shadows and not as much color payoff as the 3 Dayna's Minerals colors that they resemble. The Designer Power Lash Mascara has the multi-level bristled brush for application. This mascara is more lengthening. The Lash Extension has like a felted pad that captures the fibers and allows you to brush onto wet mascara. The Designer Volume Lash Mascara has a teddy bear brush to apply. I thought each brush worked very well for product it was to apply. 
LASH EXTENSION Fibers on "brush"
So about a week after ordering READY TO WEAR arrived and I am just GIDDY to share with you. The real powerhouse is the LASH EXTENSION so I am going to give a little detail on that one. LASH EXTENSION is NOT a mascara. Instead it is a small bottle filled with tiny black fibers. LASH EXTENSION cannot be used alone because it needs a base of wet mascara to adhere to lashes and then set with top coat of mascara. May seem like a lot of work but the results are amazing. 
Here is my before- I actually am rather blessed with long lashes. I think my use of emu oil as moisturizer also helps since my lashes are conditioned by this too. I always apply mascara last in my makeup routine and this is actually how READY TO WEAR works best because the Lash Extension fibers fall around eye area and are easily brushed away after mascaras are applied.
READY TO WEAR DESIGNER LASH VOLUME MASCARA
First I applied READY TO WEAR DESIGNER LASH VOLUME LASH MASCARA to my upper lashes. Demonstration recommends doing only one "lash" (single eye upper or lower) with mascara and then quickly applying LASH EXTENSION to the wet mascara. 
READY TO WEAR DESIGNER LASH VOLUME MASCARA & LASH EXTENSION APPLIED
This is my eye with 1 coat Volume Lash and Lash Extension (fibers) applied to my eye. Already it's almost like fake lashes have been applied to this eye. Then a layer of READY TO WEAR DESIGNER POWER LASH MASCARA was applied on top.
READY TO WEAR DESIGNER LASH VOLUME MASCARA, LASH EXTENSION, AND POWER LASH APPLIED
TO UPPER LASHES ONLY. 


Serious lashes when all three products are used without looking total spider eye and gunky. When I was watching on air I kept thinking "Twiggy false eye lash look" because the makeup artist applied to top and bottom lashes for very dramatic results. 
READY TO WEAR DESIGNER LASH VOLUME MASCARA, LASH EXTENSION AND DESIGNER POWER LASH
MASCARA APPLIED TO UPPER AND LOWER LASHES (OUTER CORNER ONLY) OF BOTH EYES. "FALLOUT" is
easily removed with a fluffy brush afterward.

Here's a side view of my lashes with all three products applied. The fibers lengthen and add "extra lashes" giving an almost false eyelash look without the trouble. 


Looks like I have tons of thick, dark lashes.
Crazy Length!!!
Fall out fibers brushed away. Tons of long, dark lashes. 
Don't you just focus on the lashes?

I keep noticing how open my eyes look with READY TO WEAR


Next up is review of my "Pan" item.